At Home on the Bay

DIY, Decor and More

  • At Home on the Bay
  • Home
  • About
    • About
    • Advertising and Disclosures
    • Featured
  • My Home
    • Blue Hill Bay Home Tour
    • Cleveland Home Tour
  • Inspiring Homes
  • Projects
    • Craft Projects
    • Sewing Projects
    • Furniture Projects
    • DIY Lighting Projects
    • Decor Projects
  • Recipes
  • Free Printables
You are here: Home / pillows / Tips for Adding Lace Trim to Pillowcases

Tips for Adding Lace Trim to Pillowcases

January 17, 2014 By Mary

Tips-for-adding-lace-trim-to-pillowcases

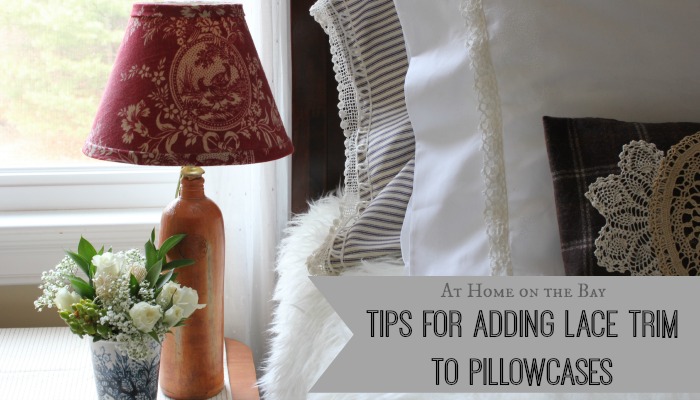
One of the most popular posts on At Home on the Bay is the Lace Trimmed Pillowcase Tutorial. It’s all about how to make your own standard pillowcase with lace trim and finished seams. There are lots of pictures to follow and it’s a fairly easy project. If you don’t want to make your own pillowcase, but want to add some lace trim to a store bought pillowcase, I am sharing some helpful tips today.

1. You’ll need about 1 1/3 yards of lace trim for each pillowcase you want to trim. Three yards would be more than enough to trim a pair of pillowcases.

tip-for-adding lace trim to pillowcases

2. When choosing lace trim, try to find trims that are machine washable, so that your finished pillowcases will be machine washable. Most cotton and cotton blend laces are machine washable. Wash and dry the pillowcase (if new) and lace trim to pre shrink before sewing.

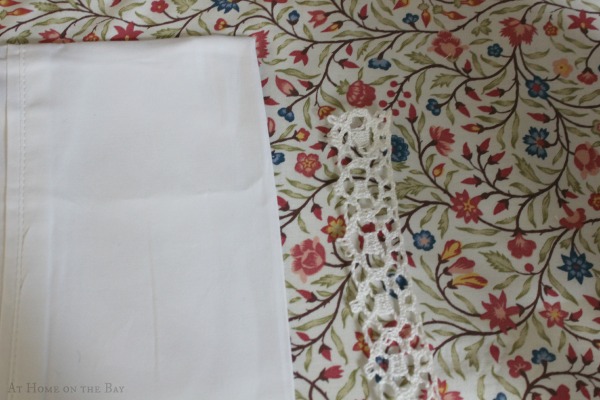
3. Begin by ironing the pillowcase and press the top 1/2 inch of the trim under. This will give a nice finished edge to the trim.

tips for adding

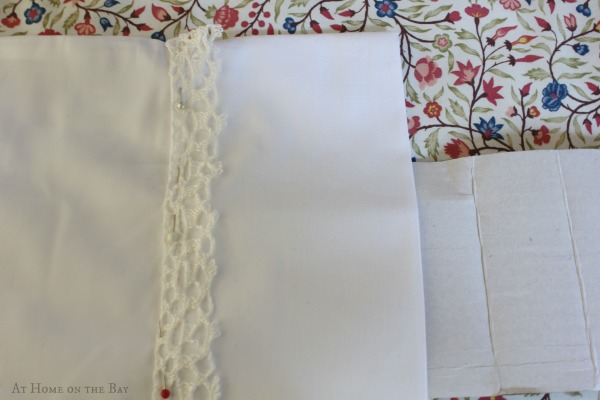
4. Pillowcases usually have one side seam. Pin the lace in place by starting at the seam edge with the folded edge of the trim down. Pins are your best friend here and will keep your lace in place. Pin the lace trim along the cuffed hem using the hem edge as a guide. To keep the pins from going through and catching the other side of the pillowcase you can slide a piece of cardboard between the pillow opening. When you get back to the seam where you started, trim the lace adding a 1/2 inch extra. Turn under 1/2 inch and pin in place next to beginning edge.

tips-for-adding-lace trim to pillowcaes

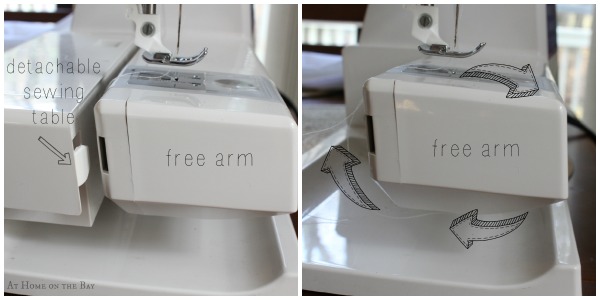
5. Most sewing machines have a detachable sewing table that reveals a free arm. Free arms are handy for pillowcase sewing.

tips for adding lace trim to pillowcases

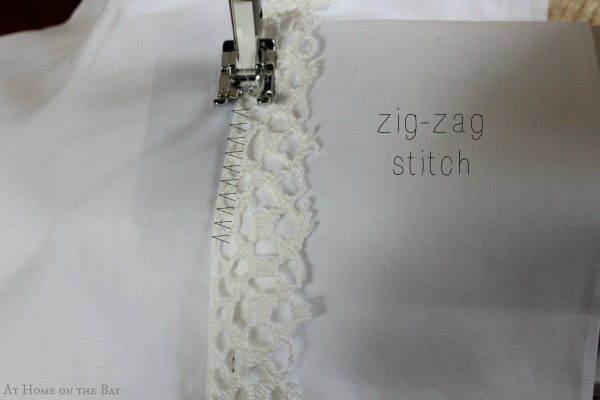
6. Using a zig-zag stitch will help in catching the open weave of the lace. When you get to the end sew back and forth across the seam area a few times connecting the two lace edges.

lace-pillowcase

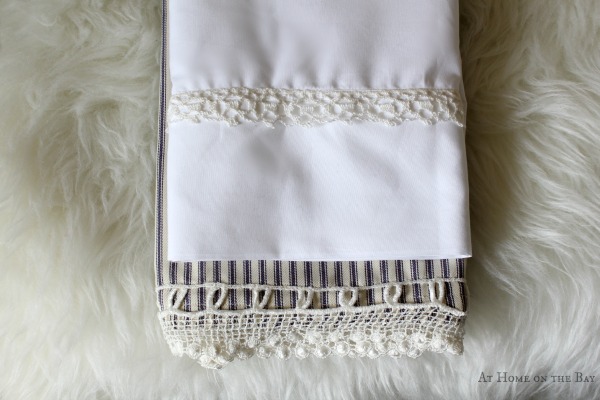
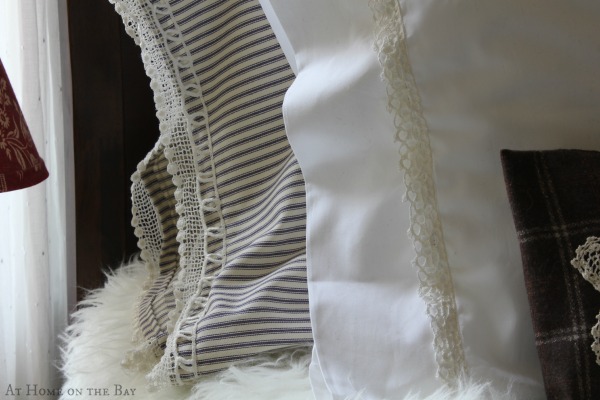
I made the blue and white ticking stripe pillow using this tutorial. The white pillow case is store bought with lace trim added. Either way you choose,  they are a fun addition to bedding.

Tips for adding lace trim

tips for adding lace trim to pillowcases

 Have a wonderful weekend!

signature

fb-share-icon
Tweet
Pin Share
«
»

Filed Under: pillows, sewing, tutorials

Comments

  1. Stacey says

    January 17, 2014 at 8:14 am

    I don’t sew but absolutely love this idea.

  2. cassie says

    January 17, 2014 at 8:20 am

    such pretty detail! i love it!

Trackbacks

  1. Lace Trimmed Standard Pillowcase Tutorial - At Home on the Bay says:
    January 20, 2014 at 10:44 am

    […] Find tips for adding lace to store bought pillowcases here. […]

  2. Colorful Eclectic Master Bedroom Reveal - At Home on the Bay says:
    February 11, 2015 at 5:58 am

    […] The bedding is from Ralph Lauren. It’s the Kimberly pattern and I’ve had it for years and years along with the vintage bedspread. The shams and accent pillow are new.  The white lace trimmed pillow case is from this tutorial. […]

  3. 20 Ways to Sew a Pillowcase - and WINNER! - Tidbits says:
    April 9, 2015 at 1:45 pm

    […] If you are interested in sprucing up a store bought pillowcase, simply stitch some trim on the cuff and feel just as good as you would about making one from scratch.  Another great idea from At Home on the Bay. […]

Hi There, I’m Mary!

Welcome to At Home on the Bay where I share my love for DIY, decorating, sewing, thrifting and baking all while living in our little slice of Heaven on Blue Hill Bay.
. Read More…


Please follow & like us :)

RSS
Follow by Email
Facebook
Facebook
fb-share-icon
Pinterest
Pinterest
fb-share-icon
Instagram


Search This Blog

Categories

Like us on Facebook!

At Home on the Bay

Please follow & like us :)

RSS
Follow by Email
Facebook
Facebook
fb-share-icon
Pinterest
Pinterest
fb-share-icon
Instagram

Copyright © 2025 · Darling theme by Restored 316

[footer_backtotop] · · · Copyright © 2025 At Home on the Bay · · · Log in

»
«