At Home on the Bay

DIY, Decor and More

  • At Home on the Bay
  • Home
  • About
    • About
    • Advertising and Disclosures
    • Featured
  • My Home
    • Blue Hill Bay Home Tour
    • Cleveland Home Tour
  • Inspiring Homes
  • Projects
    • Craft Projects
    • Sewing Projects
    • Furniture Projects
    • DIY Lighting Projects
    • Decor Projects
  • Recipes
  • Free Printables
You are here: Home / Christmas / Winter Wonderland in a Bowl

Winter Wonderland in a Bowl

December 6, 2013 By Mary

winter wonderland in a bowl - an easy tutorial - At Home on the Bay

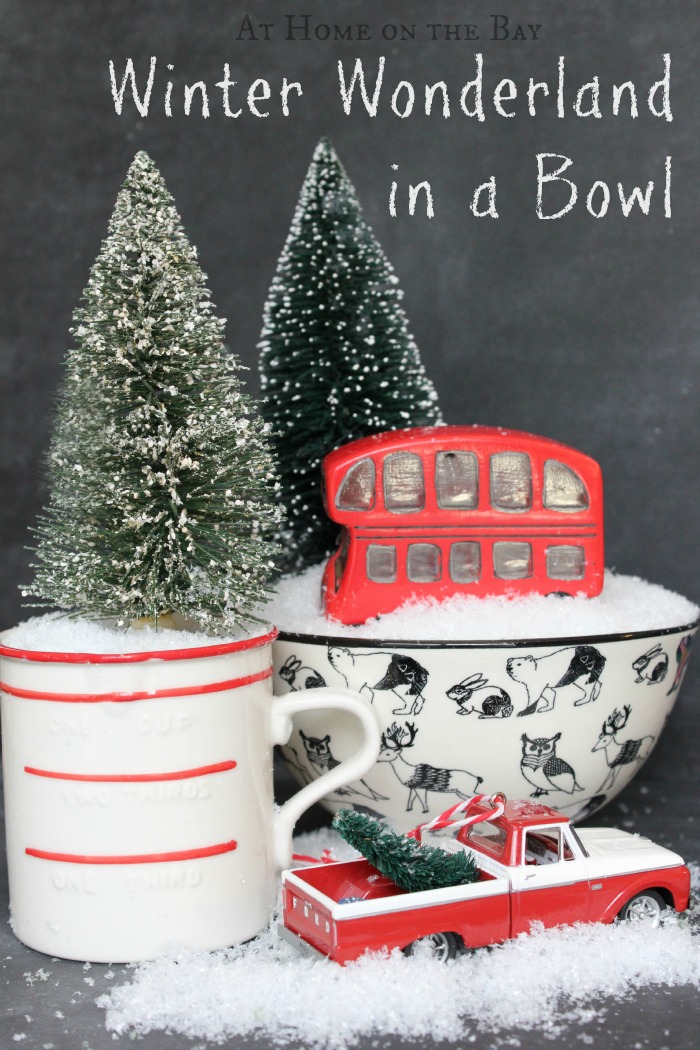
Here is my twist on the snow globe. I like to call it the snow globe deconstructed or winter wonderland in a bowl, because I’m fancy like that.

It’s a little Christmas village to cheer up my kitchen.
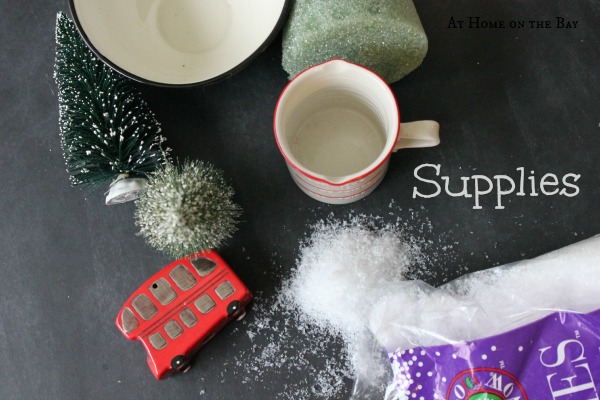
winter wonderland in a bowl - supplies

SUPPLIES:

assorted bowls and cups

assorted ornaments and trees

Styrofoam

white glue

Elmer’s Tack

Eco Snow Flurries*

hot glue and toothpicks

winter wonderland in a bowl - steps

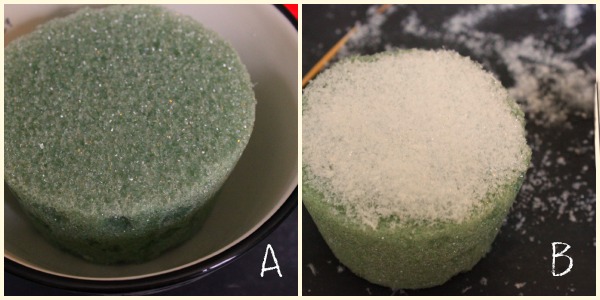
A. Cut Styrofoam to fit inside container. B. Spread white glue on top of Styrofoam and dip top into faux snow.

Place Styrofoam back into bowl and secure using Elmer’s Tack. (Elmer’s Tack is an putty type adhesive used to temporarily secure things in place. I want to be able to use these bowls and cups after Christmas, so I don’t want to permanently glue the Styrofoam into the containers.) Use hot glue to add the decorations on top of the Styrofoam. I used toothpicks to secure the bus in place, because it had a hole in the bottom of it. Once you are done placing everything, add more faux snow to cover any Styrofoam showing.

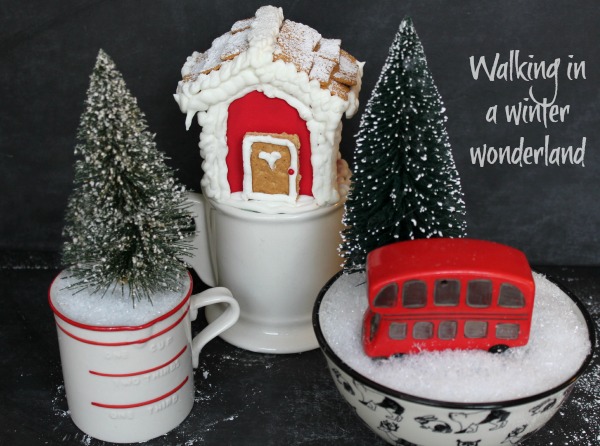
That is it. You are done. You now have your very own winter wonderland.

winter wonderland in a bowl - an easy tutorial/At Home on the Bay

Sleigh bells ring, are you list’ning?
In the lane, snow is glist’ning’
A beautiful sight, we’re happy tonight
Walkin’ in a winter wonderland

Have a wonderful weekend!

signature* This post contains an affiliate link.

X2W6P5ZZ2P2Z


fb-share-icon
Tweet
Pin Share
«
»

Filed Under: Christmas, crafting, DIY, holidays, seasonal decorating, tutorials

Comments

  1. Anna @ A Good Home says

    December 6, 2013 at 9:16 am

    Love it, as usual! I made something very similar for our coffee table. I’ll post it on IG in a few minutes 😉

  2. Barbara (WA) says

    December 6, 2013 at 11:54 am

    “Snow globe deconstructed” – haha! But what a sweet idea, thanks!

  3. Ann says

    December 6, 2013 at 7:43 pm

    So cute and I love those little trees!

  4. Rosella says

    December 6, 2013 at 10:14 pm

    Awww so pretty!!! This is such a sweet idea.

  5. Kelly @ Eclectically Vintage says

    December 8, 2013 at 1:36 pm

    LOVE this – you are one creative gal!!
    Kelly

Hi There, I’m Mary!

Welcome to At Home on the Bay where I share my love for DIY, decorating, sewing, thrifting and baking all while living in our little slice of Heaven on Blue Hill Bay.
. Read More…


Please follow & like us :)

RSS
Follow by Email
Facebook
Facebook
fb-share-icon
Pinterest
Pinterest
fb-share-icon
Instagram


Search This Blog

Categories

Like us on Facebook!

At Home on the Bay

Please follow & like us :)

RSS
Follow by Email
Facebook
Facebook
fb-share-icon
Pinterest
Pinterest
fb-share-icon
Instagram

Copyright © 2025 · Darling theme by Restored 316

[footer_backtotop] · · · Copyright © 2025 At Home on the Bay · · · Log in

»
«