I tried a gallery wall in the dining room, but I am not happy with it. It feels like a bit of a hot mess. I didn’t plan out the placement of the pictures and plates very well and as a result it feels like it’s in disarray. I have to think of an alternate plan – possibly a mirror. But I do like gallery walls and decided to try it again in the living room. This time I planned it out.
I gathered some pictures that I wanted to hang. I have lots of smaller pictures, so a gallery wall is a nice way to display them and make them feel like one large piece of artwork.
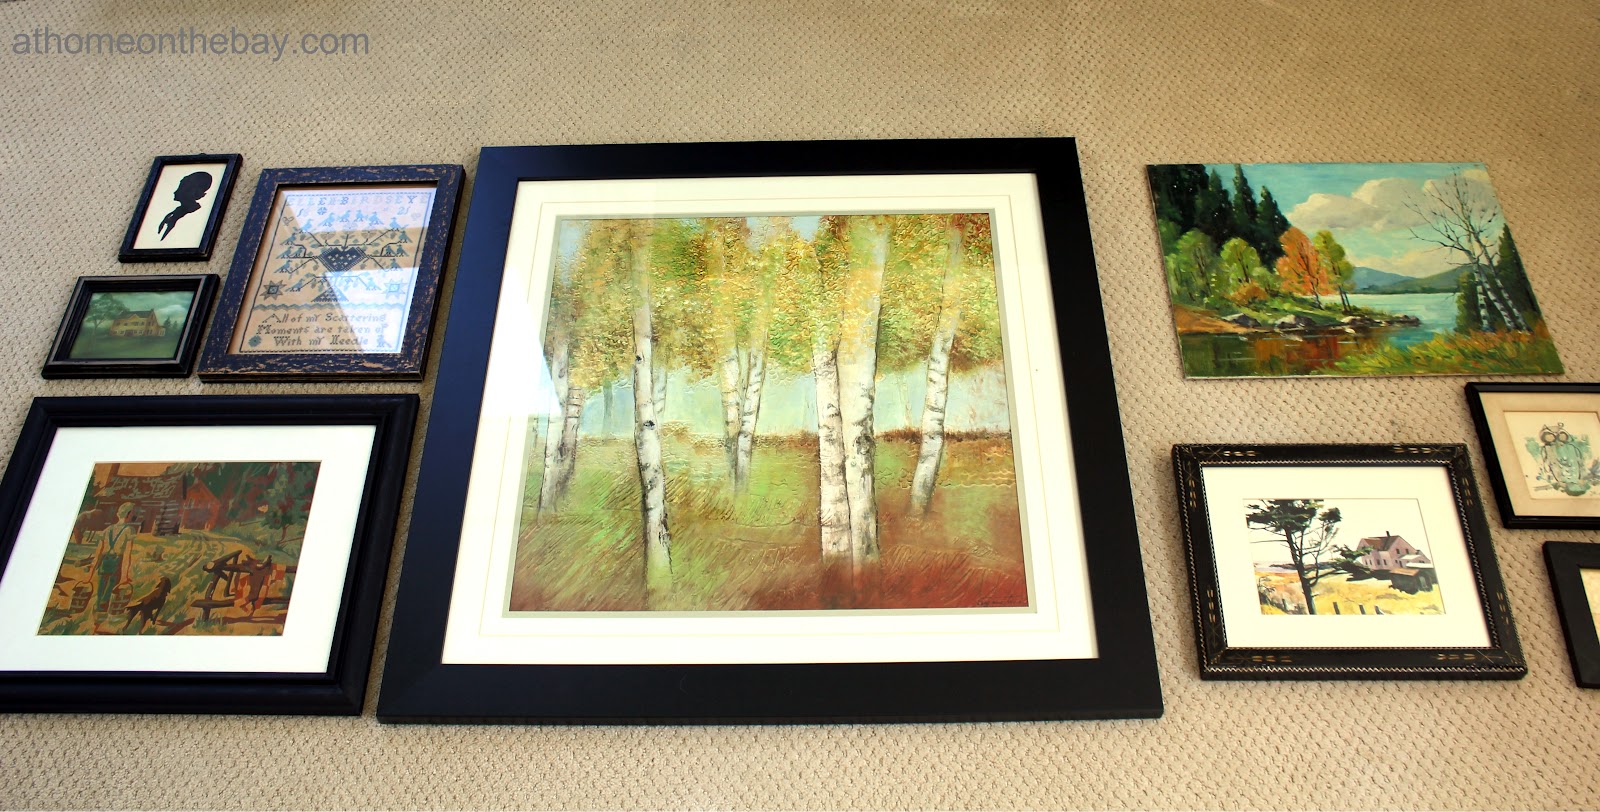
To make it cohesive I chose a few paintings, a few cross stitch samplers and a few silhouettes. Most had black frames, one was oak and one painting didn’t have a frame at all. My husband made me a simple frame out of some wood he had leftover from another project. He is good like that. Maybe I can get him to write a tutorial for us one of these days.

I painted those two frames black to match the other frames – again trying to keep it cohesive.

I moved the pictures around on the living room rug until I had an arrangement that I liked. The walls are old fashioned plaster, so if you make a mistake and have to remove a nail, it leaves a big hole in the wall which has to be repaired with plaster which is a nightmare, so I decided to use Command Strips.

I started by centering the large picture on the wall. I used a nail for that picture, because it is very heavy, and I didn’t want to take a chance with the Command Strips holding that kind of weight. I then worked my way out.

I found the Command Strips at Walmart and I found two different types. One said it was for pictures up to 12 pounds and the other said it was for pictures that were 18″ x 24″. I’m not sure what the difference is, or if the 18″ x 24″ strips were stronger than the twelve pound strips, but I didn’t have anything that was that heavy. First, I added the strips to the back of the frame. I held the frame up to the wall exactly where I wanted it to hang. Then I pushed it onto the wall holding it in place for a few seconds to make sure it stuck. I did make a mistake and had to remove one strip from the wall. It did remove cleanly, but it couldn’t be reused. At least I knew if I make a mistake, I wouldn’t leave a big hole in the wall.

There was one picture that had a hanging wire on the back attached with eye screws. I couldn’t use Command Strips on this one unless I took the eye screws out, so I decided to use a nail. To hang this one, I traced the frame onto a piece of paper marking the highest point of the wire. After cutting out the picture shape, I taped it to the wall where I wanted the picture to sit. I lined up the hanger with the mark on the paper and nailed it in pulling the paper off. This worked really well.

I like how it turned out thankfully, and I only had to make two nail holes which was a bonus.

A little planning went a long way on this one.

Sharing with:
love it. pinned it!
I think it turned out great! We have plaster walls in our house too and I learned the hard way how much damage a nail can do. Especially since I am terrible at hanging things up! I think I’ll give those strips a try the next time I need to hang something.
this is awesome !! i plan on making a room in my house a studio and deff plan on having a display gallery similar to this. I love how the frames are perfectly aligned !
Great job! Gallery walls are not exactly easy to pull off… but you did it with style! And I’m loving the pillows on your sofa, where did you get them?
Mary….what a great idea. You are so much better than me 🙂 I never plan and sometimes it works out…..sometimes not so great 🙂
blessings,
karianne
Very Nice! I’m intrigued about those hanging strips. I’ve only tried them once with the boy’s hot wheels kit, and so far so good- I can’t believe you can even hang framed pictures with them!
Lovely arrangement! Tanya 🙂
Kerry finally shared the address to your new blog. I was missing your old blog! Since I don’t knit, this one is even MORE interesting to me – we’re always trying to freshen up the house. I’m wondering something about this post. The bottom left painting looks like it depicts a scene right near the house? Am I right? If not, it reminds me very much of the area over that little bridge.
Really loving the new blog! (Well, it’s new to me even though you’ve been doing it for a while now.)