At Home on the Bay

DIY, Decor and More

  • At Home on the Bay
  • Home
  • About
    • About
    • Advertising and Disclosures
    • Featured
  • My Home
    • Blue Hill Bay Home Tour
    • Cleveland Home Tour
  • Inspiring Homes
  • Projects
    • Craft Projects
    • Sewing Projects
    • Furniture Projects
    • DIY Lighting Projects
    • Decor Projects
  • Recipes
  • Free Printables
You are here: Home / crafting / Tea Bag Plant Markers

Tea Bag Plant Markers

February 25, 2013 By Mary

Tea Bag Plant Markers

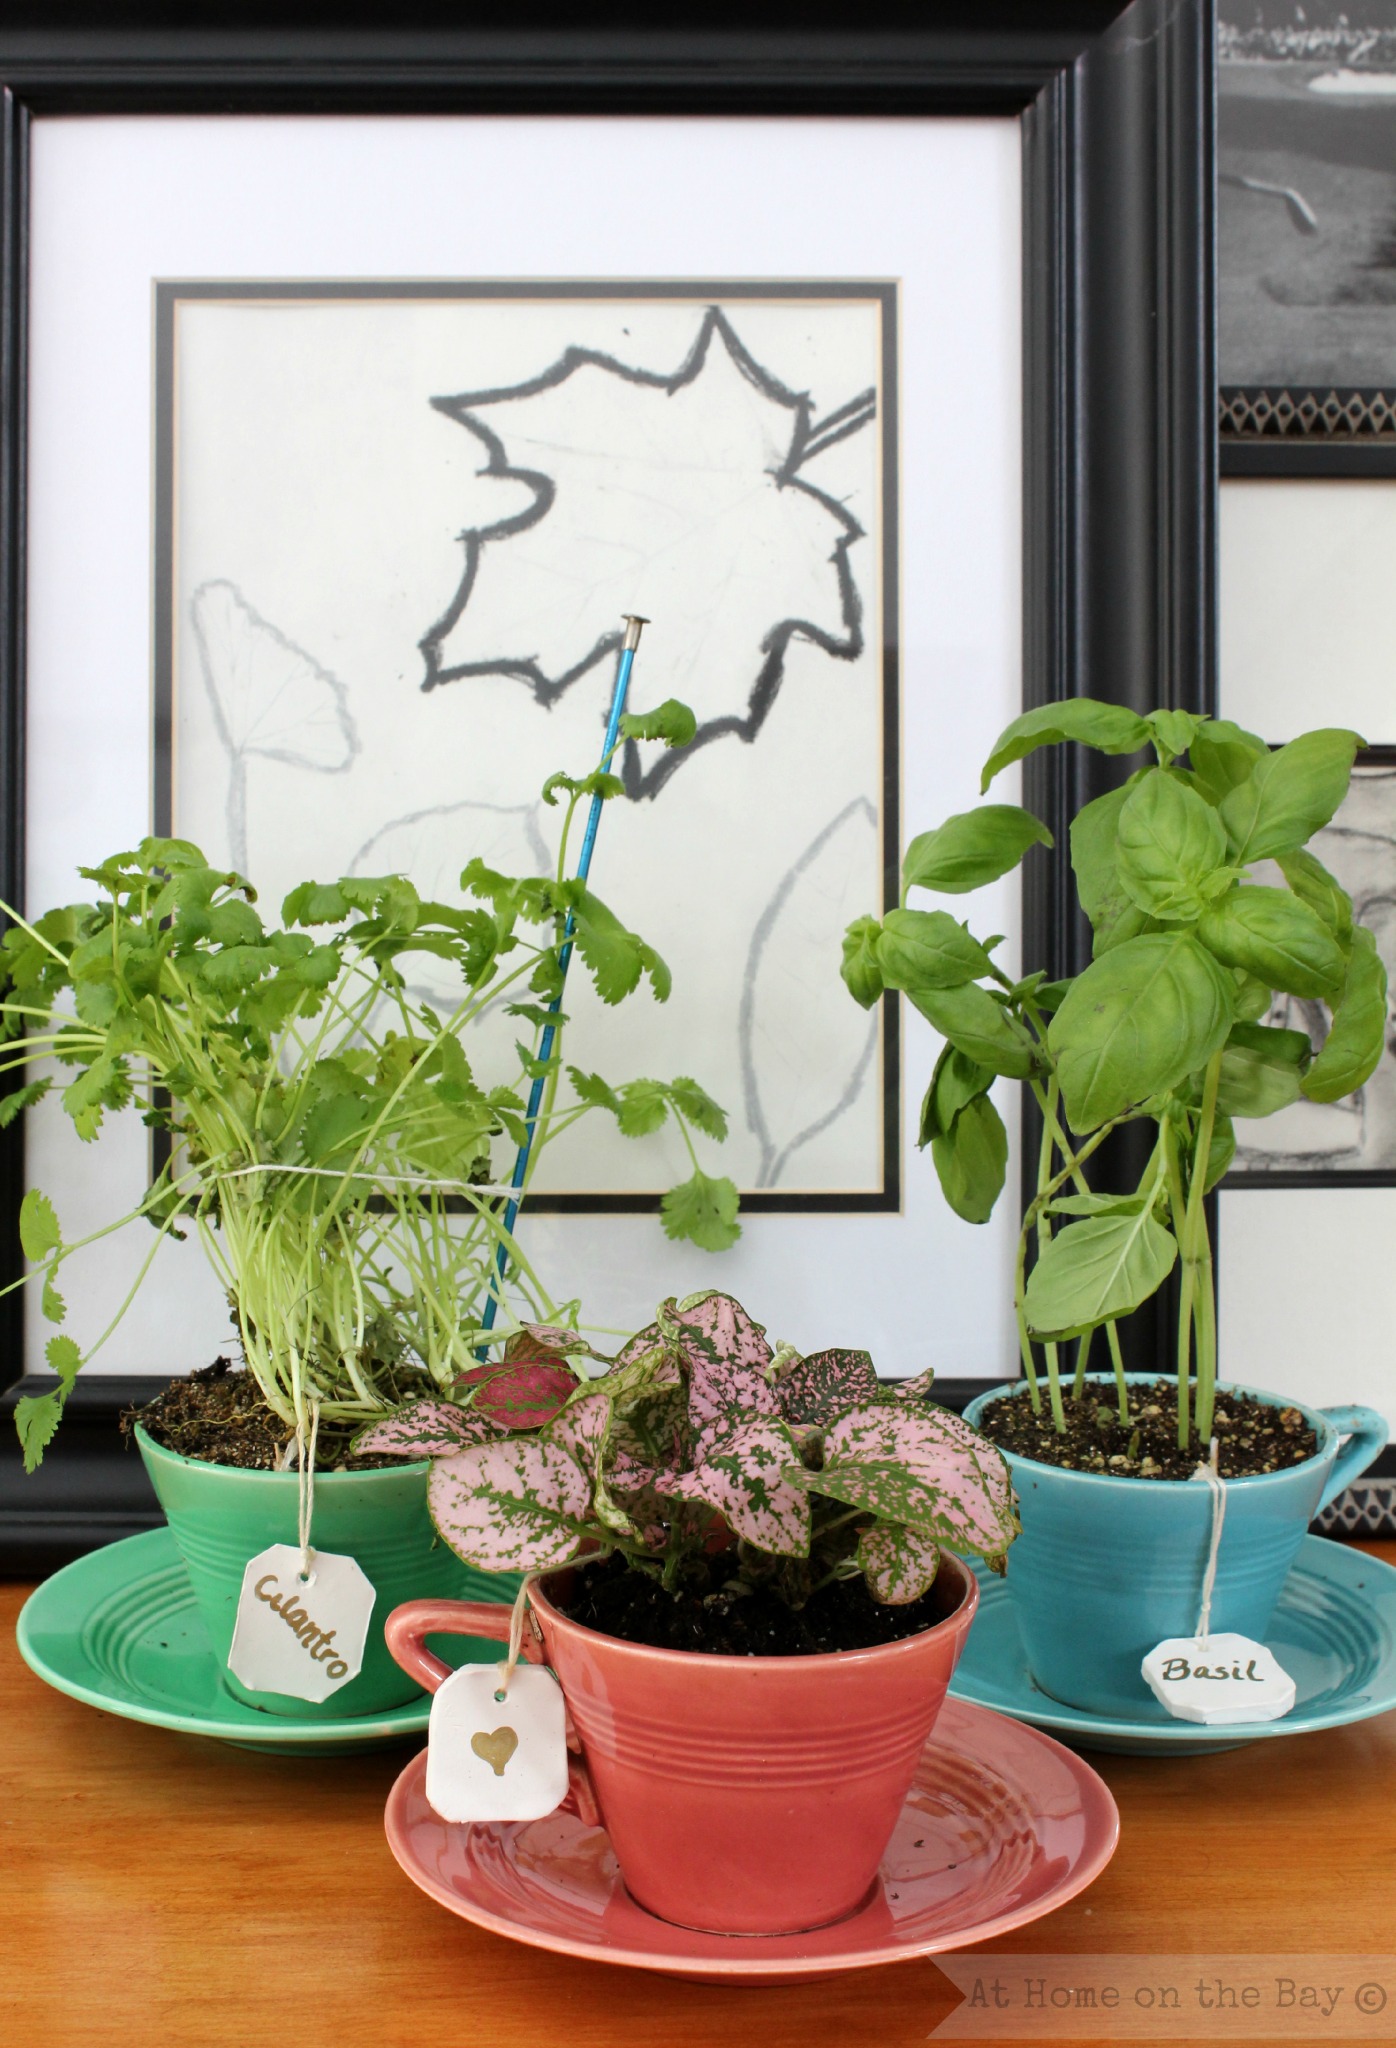
Whenever I am perusing yard sales and I see a piece of vintage pottery, I usually buy it even if it has a little chip in it.  The colors are so pretty and I can always find an alternative use for it.  For example, these Harlequin tea cups that have a few chips here and there are no longer tea worthy, but they are the perfect size for a kitchen windowsill herb garden. Naturally, I decided to make tea bag markers.  Doesn’t everyone think this way?

Tea Bag Plant Markers

Supplies:

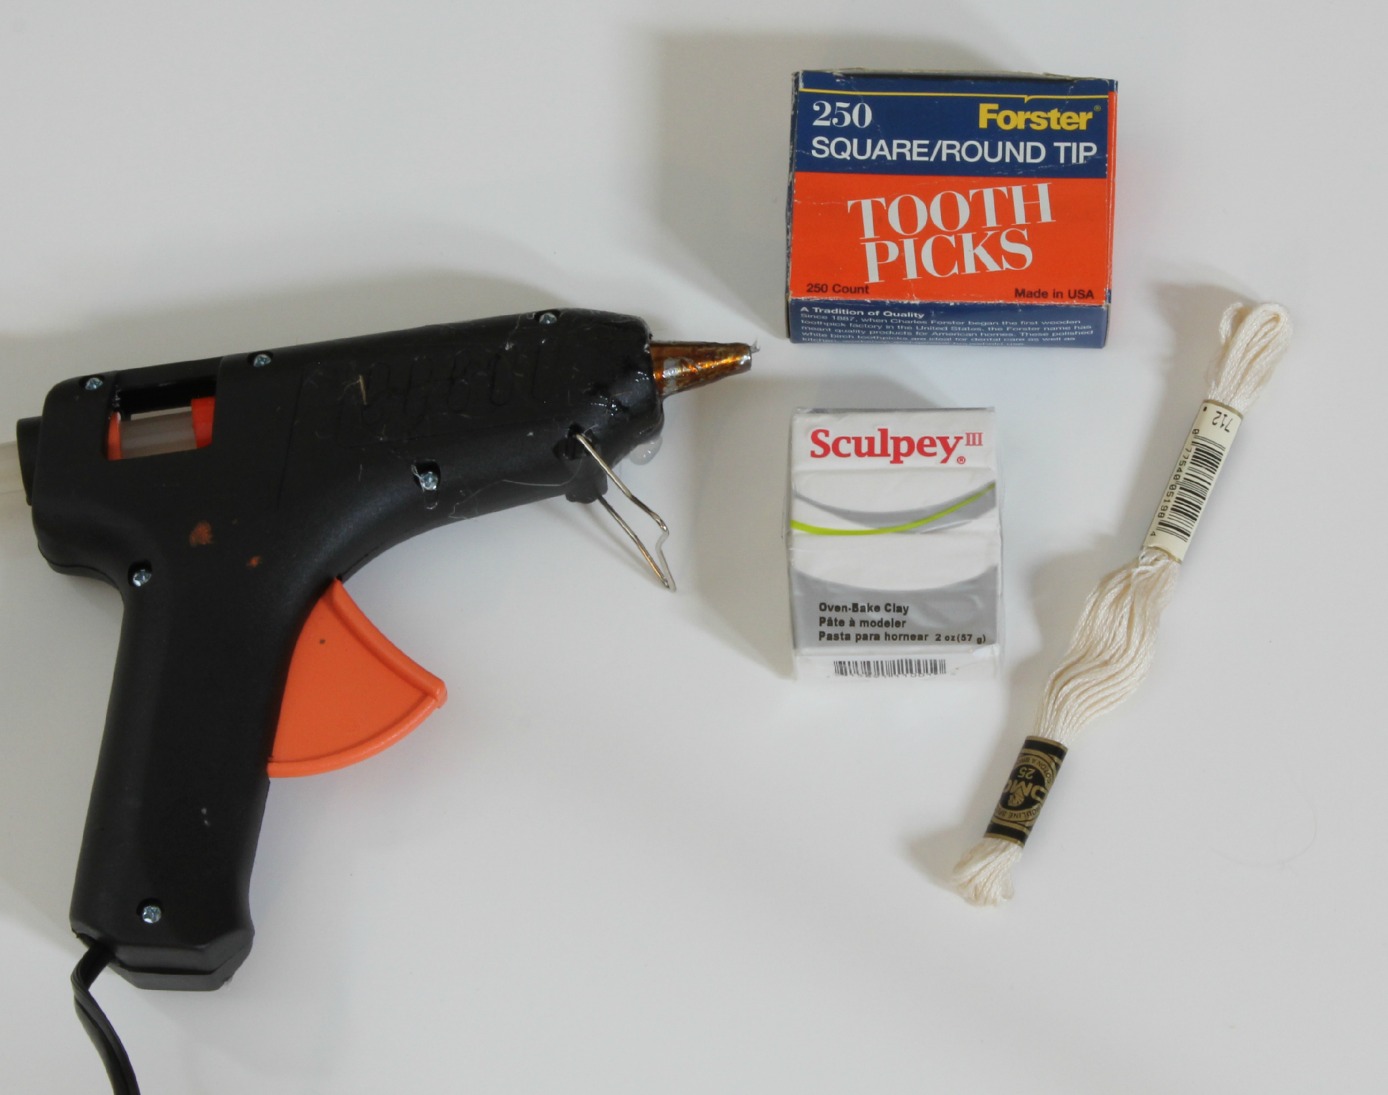
Sculpey Oven-Bake Clay

Toothpicks

Embroidery Floss

Glue Gun

Permanent Pen

Tea Bag Plant Markers

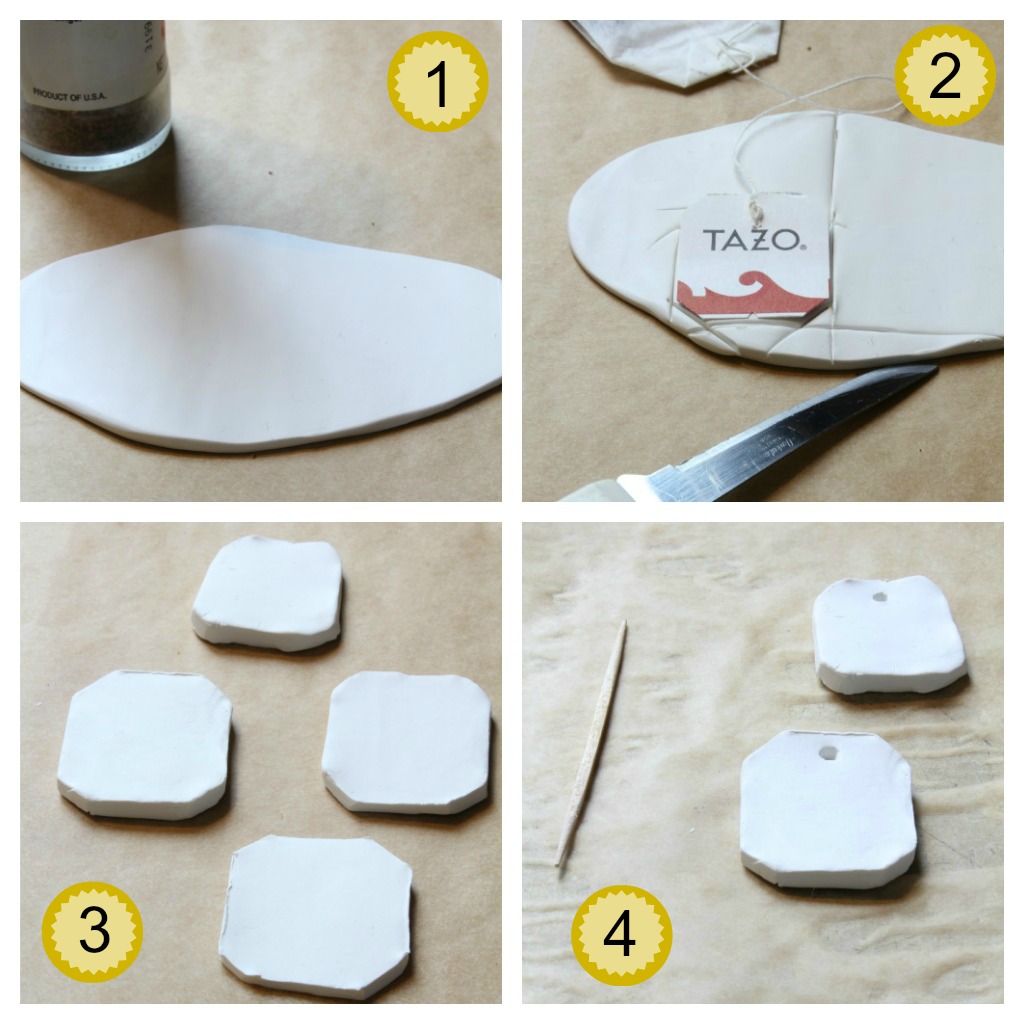
1. Begin by conditioning the clay.  This is done by working the clay in your hands until it is soft and pliable.  Once the clay is conditioned roll it out (I used a spice bottle.) on top of a piece of parchment paper until it is about 1/4 inch thick.

2. Using a sharp edge cut out tea bag tag shapes from clay.  I used an actual tea bag tag as a template.

3. Once you have your tags cut out, smooth out any rough edges.

4. Using a toothpick, make holes in the top of the tags for string.  Bake according to the package directions.  I baked mine at 275* for 15 minutes.  Allow to cool completely.

Tea Bag Plant Markers

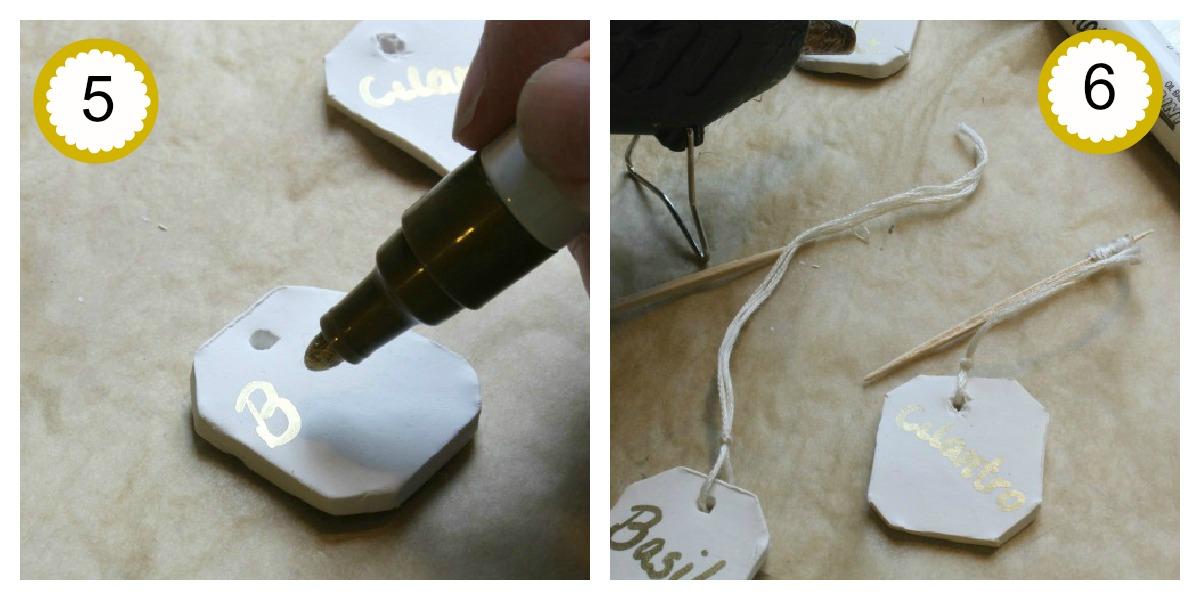
5. Use a permanent pen to mark each tag.

6. Cut a 10 inch length of floss and thread through the hole.  Make a knot at the bottom.  Cut to desired length leaving an inch or two for wrapping around toothpick.  Wrap loose ends around the top of a toothpick and hot glue in place.  Stick toothpick all the way down into dirt to secure in place.

Tea Bag Plant Markers

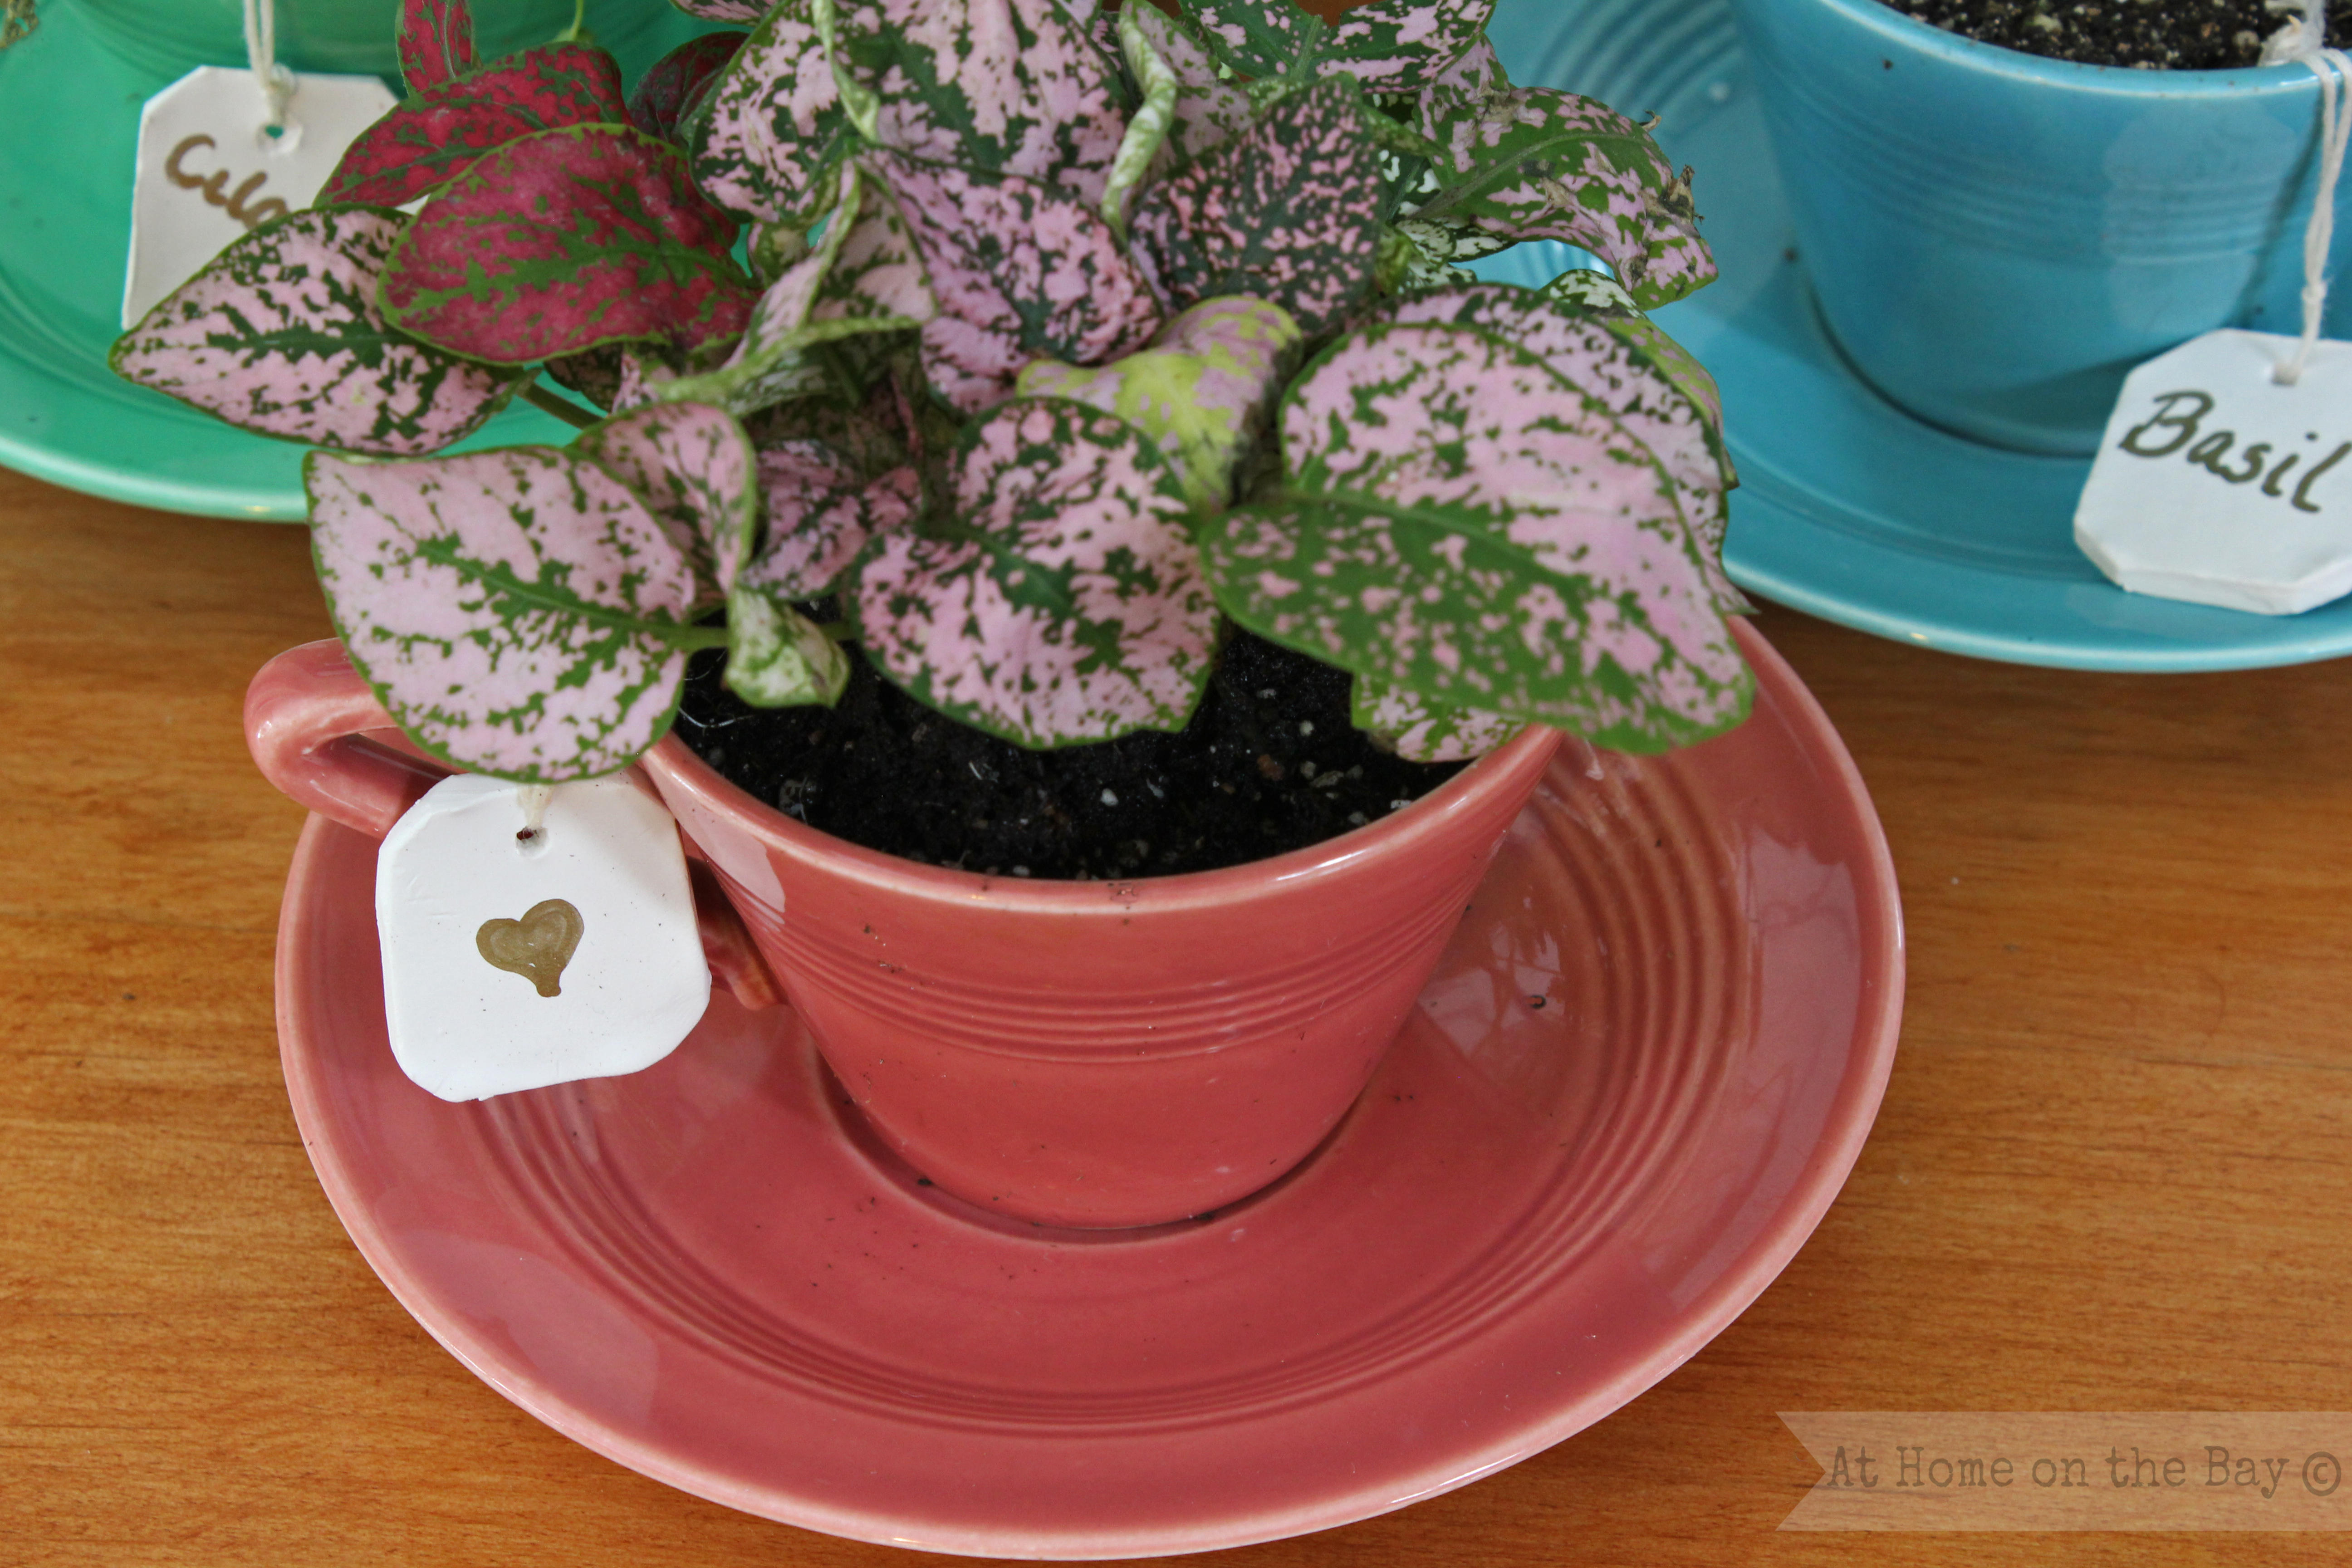
I hope my basil and cilantro make it.  They look pretty sad, but they smell amazing.  I had to use a knitting needle to hold up the cilantro.  Just another way to use something for other than its intended purpose.

Sahring with:

Home Stories A to Z

fb-share-icon
Tweet
Pin Share
«
»

Filed Under: crafting, gardening

Comments

  1. Vickie says

    February 26, 2013 at 6:18 am

    I think the vintage cups and saucers are ideal for kitchen plants and the teabag plant markers are a fun way to label your plants! I love the colors of the pottery!

  2. cassie says

    February 26, 2013 at 6:25 am

    that is such a cute idea!!! i may steal this for teacher gifts! 🙂

  3. Rosella says

    February 26, 2013 at 9:28 am

    Love this!!! I would like to make some markers for my garden and might have to experiment with Sculpey? Your reclaimed pottery is perfect for your windowsill garden.

  4. Judy Clark says

    February 26, 2013 at 10:58 pm

    Love your little “planters”. Your tags are darling!

    Judy

  5. Thistle says

    March 2, 2013 at 10:56 am

    Mary,

    I LOVE these! You always have the most creative things! Would you mind if I put these on facebook?

    Have a blessed and amazing day!
    karianne

Trackbacks

  1. Upcycled Teacup Ideas says:
    February 28, 2013 at 6:22 am

    […] Click here for instructions on how to make tea bag plant markers from Sculpey clay. […]

  2. Tutes & Tips Not to Miss {98} - Home Stories A to Z says:
    March 4, 2013 at 9:02 am

    […] Tea Bag Plant Marker Tutorial by At Home on the Bay. […]

  3. Five DIY Gifts for Mom says:
    May 9, 2013 at 3:09 pm

    […] Tea Cup Herb Garden with Clay Tea Bag Plant Markers: You could give Mom some herbs planted in tea cups. These little tea bag plant markers were made with oven-bake clay. If you have never tried oven-bake clay, this is a great starter project. The tutorial is easy to follow. I saw tea cups at the dollar store too. […]

  4. 15 Creative Ideas to Repurpose Old Teacups for Home Decor | Interior Design Blogs says:
    February 28, 2015 at 10:58 am

    […] 12. Plant a Herb Garden Image via: athomeonthebay […]

  5. 15 Creative Ideas to Repurpose Old Teacups for Home DecoriHomeidea - intelligent platform | iHomeidea - intelligent platform says:
    March 2, 2015 at 10:49 am

    […] 12. Plant a Herb Garden Image via: athomeonthebay […]

Hi There, I’m Mary!

Welcome to At Home on the Bay where I share my love for DIY, decorating, sewing, thrifting and baking all while living in our little slice of Heaven on Blue Hill Bay.
. Read More…


Please follow & like us :)

RSS
Follow by Email
Facebook
Facebook
fb-share-icon
Pinterest
Pinterest
fb-share-icon
Instagram


Search This Blog

Categories

Like us on Facebook!

At Home on the Bay

Please follow & like us :)

RSS
Follow by Email
Facebook
Facebook
fb-share-icon
Pinterest
Pinterest
fb-share-icon
Instagram

Copyright © 2025 · Darling theme by Restored 316

[footer_backtotop] · · · Copyright © 2025 At Home on the Bay · · · Log in

»
«