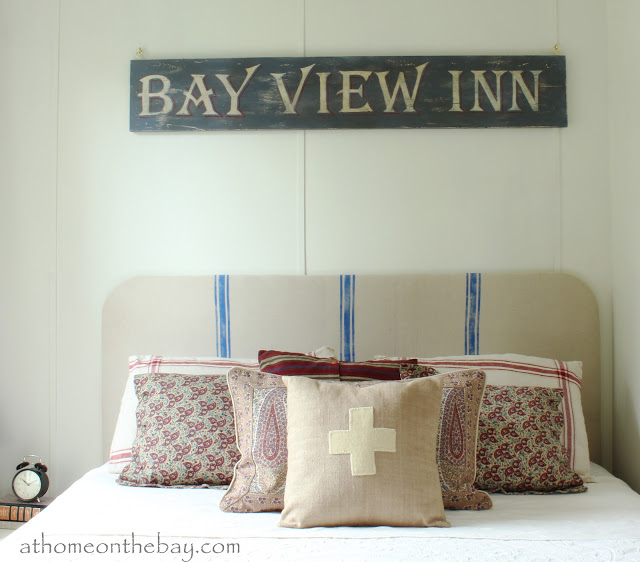

I made a sign … a vintage looking sign … with (you guessed it) Annie Sloan Chalk Paint. I know … I know … I use this paint for everything. Your probably thinking I’m either a distributor or that I’m just plain crazy. I can assure you I’m not a distributor and I have bought every precious can that I have used. I am crazy though … about this paint. I love the colors and the fact that there isn’t any priming necessary. You can also get many projects out of one can. The first can I bought was Old White. I bought it last September. I painted a shelf, a chair, the inside of a cupboard, mixed it with other colors to paint a buffet and TV cabinet and I still have a 1/4 of a can left. It’s pretty amazing stuff, but I digress. Here are the details of how I made the sign:
I used a piece of old wood we had in our garage. It was 1″ thick x 10″ tall x 5′ long. I gave it a coat of Annie Sloan Chalk Paint in Old Violet. For this project you only need a sample pot size and you will still have leftover paint.

I made a Word Document using a font I thought looked vintage called Algerian. I adjusted the font size to 580 so the letters were big enough to fit on the board. If you want to try making one yourself – here is the link to the letters I used for this sign.

I taped the letters together cutting off any extra paper on the sides, but leaving the bottom edge for making sure the letters were straight. I centered them on the board and taped them down to keep them from shifting. I traced each letter by outlining it with a ball point pen.

You can see the pen etched a white chalk mark on the paint.

I outlined the letters with a white medium point Sharpie Paint Marker.

I added the red highlight detail with a red medium point Sharpie Paint Marker.

Then I filled in the letters with Annie Sloan Chalk Paint in Old White using a small flat brush.

I let it dry.

Then I gave it a light coat of clear wax. The clear wax deepens the color and adds sheen.

I let the wax set overnight. I really liked the sign just as it was and thought about whether or not to age it. In the end the aging won out. I gave it a light sanding with 100 grit paper.

Then I finished it with a light coat of dark wax.

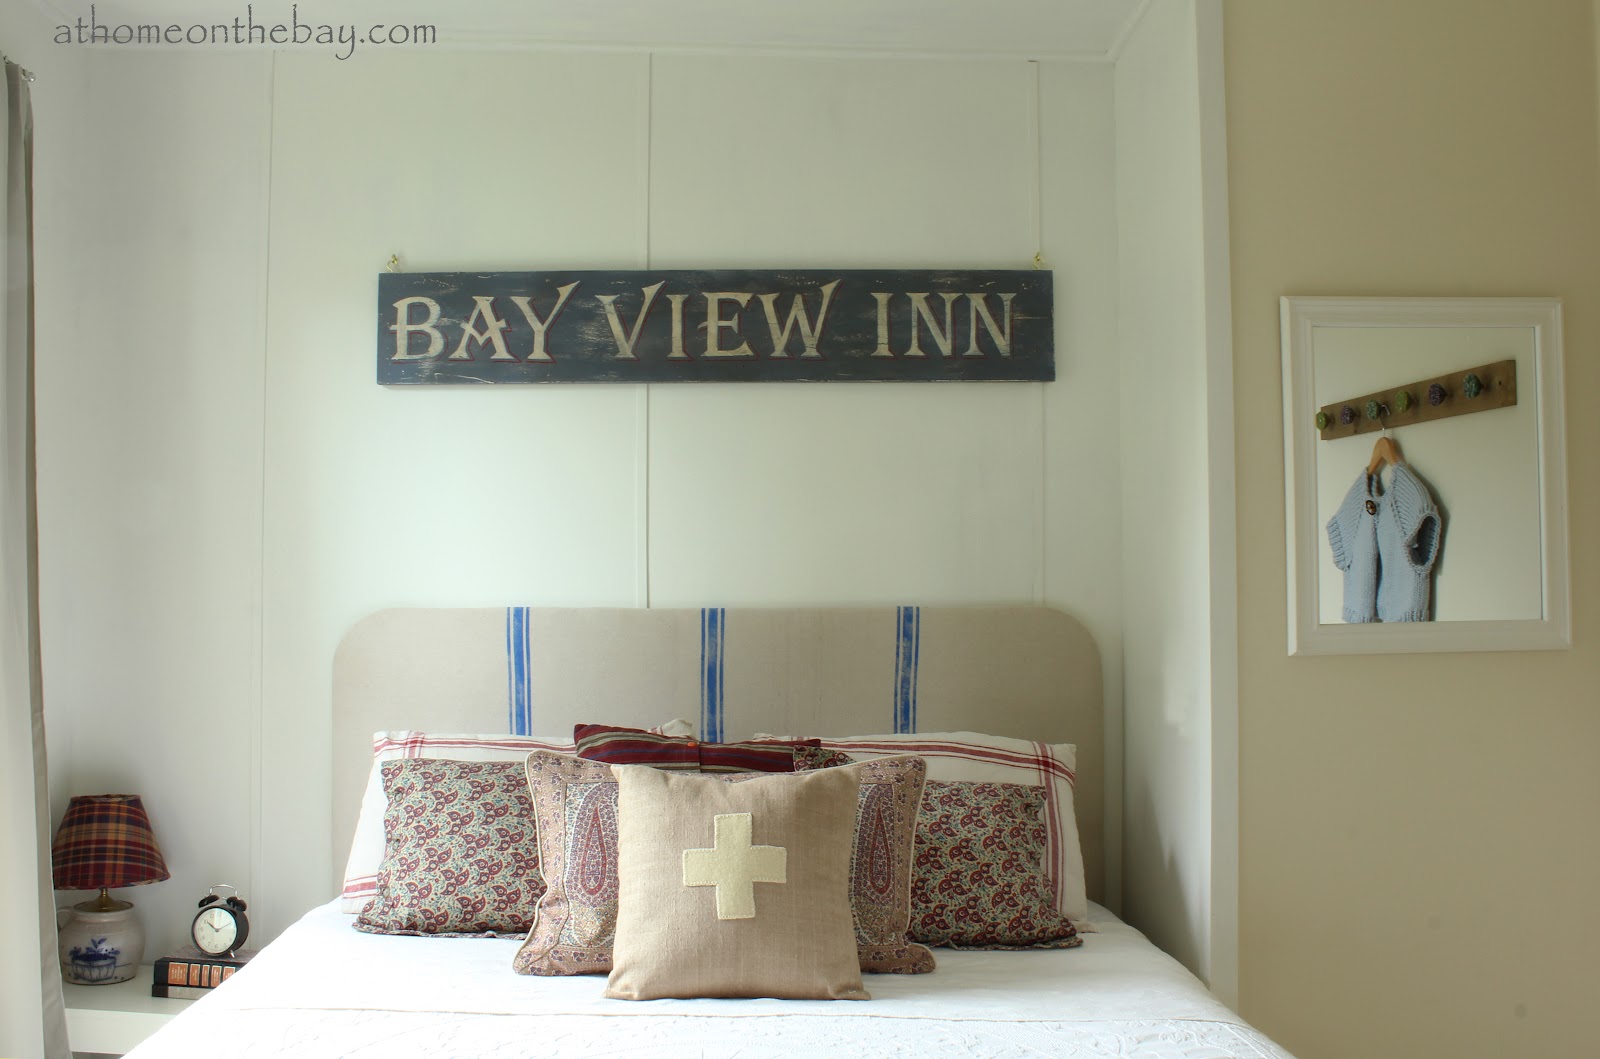
We used hook and eye bolts to hang the sign.

I’m warning you though, because these signs are fun to make.
Here are some other great tutorials for making signs:
Linking with:
Your sign is beautiful! Thanks for the tutorial. I’ve got to get some of those paint markers. They worked really well. Love it!
This is a beautiful sign. Your blog is giving me a lot of good ideas for projects for my home. I just ordered some Annie Sloan paint, for the first time, so I can try it out on some pieces of furniture and other pieces. I can’t wait! Thanks for all of the great projects!
Love the new sign! I’ve been decorative painting for decades, but have yet to use a paint marker. I’ve got to get me one!
Your room looks fabulous!
You did a fantastic job! This is a beautiful sign.
I love that headboard that you already posted about….and now I love this sign even more! Thanks for sharing!
Have a blessed and wonderful day!
karianne
It’s perfect! I love the colors you chose. That bit of red really takes it to the top!!
<3 Christina at I Gotta Create!
Wildly Original Round Up party is open.
Another fabulous chalk paint project! I really need to give that stuff a try 🙂
I recently attempted my first multi-coloured painted sign and love your idea to do the red “shadow” with a paint pen for more precision.
Thanks for the great tutorial and inspiration!
That looks so awesome, Mary! I’m totally loving all of your tutorials.
Your sign turned out great! Thanks for sharing your tutorial.
Simply beautiful! And such a great tutorial!
What a beautiful looking sign! Thanks for posting a tutorial!
I love this sign, great font and the red really makes it pop!
Great job!
Susan
Homeroad
LOVe this sign…thanks for sharing it at my party. Love your headboard too:)
Blessings,
Linda
I almost forgot to tell you..come by and grab my starfish feature button for your blog, because you have been featured at NTT this week.
Blessings,
Linda
It’s in fact very complex in this active life to listen news on TV, so I only use world wide
web for that reason, and obtain the latest news.
Look at my weblog: roll up Opole