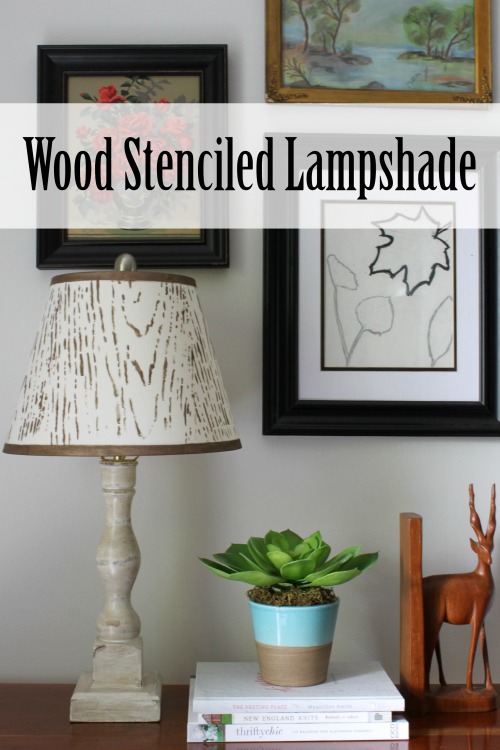
I recently watched this pretty incredible video of a man who handmade a translucent wooden shade by turning a stump of wood on a lathe. I was so impressed. I showed it to my husband and asked him if he could make one for me. I got the are you serious look. Ha, I didn’t think so, but wanted to check first. So, when I received this wood grain stencil from FolkArt Stencils & Paint, I new exactly what I was going to do with it. You can’t stop this girl. I even had a $3 yard sale lampshade just begging for an update. This is how great ideas are born. Right?
Supplies:
Lampshade
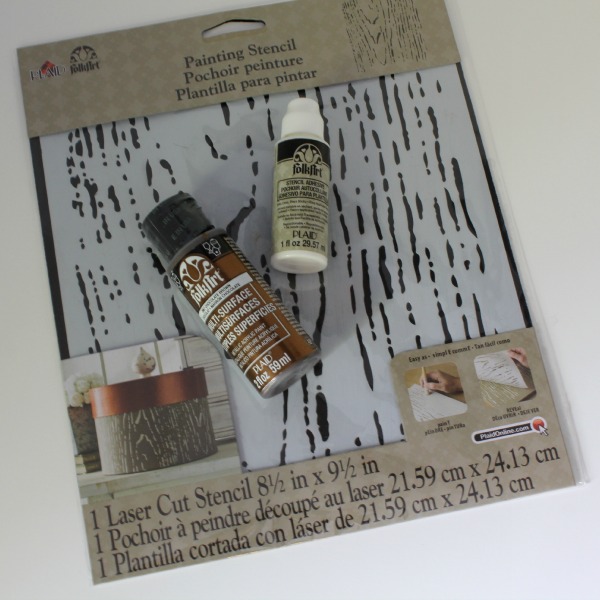
FolkArt Multisurface Paint*
(I used Metallic Chocolate Brown)
Stencil Brush
Small Flat Brush – optional (for painting trim)
*You can find these new FolkArt stencils, paints and more at Michaels.
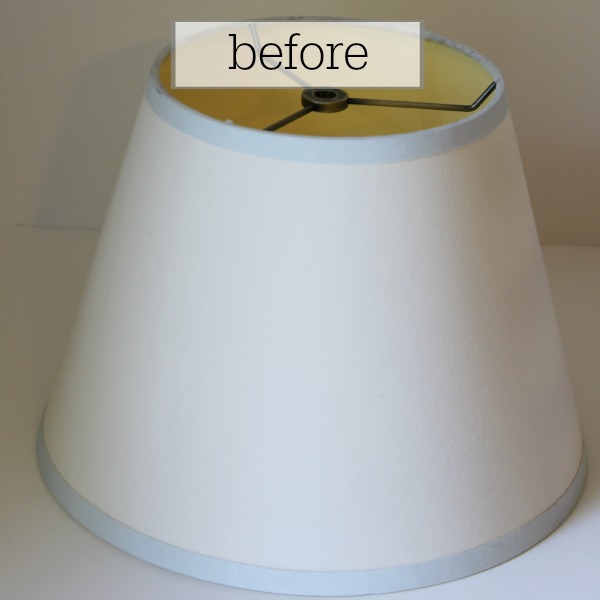
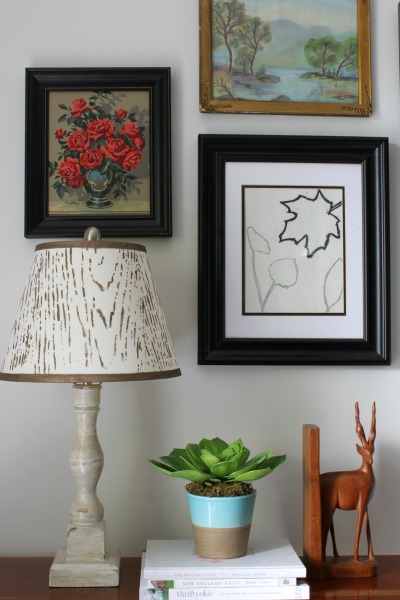
I started with this lampshade I picked up at a yard sale, but you can use any lampshade you like.
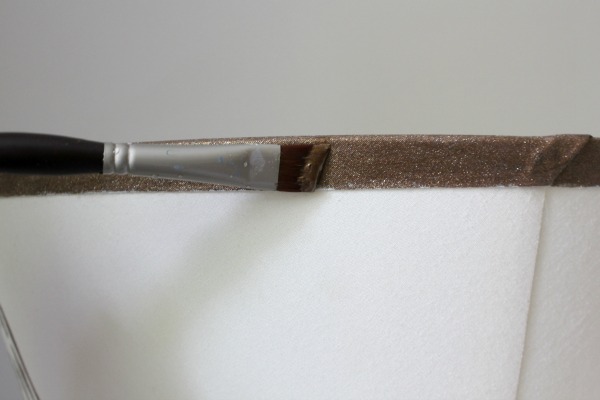
Step 1: I used the small flat brush to paint the bias trim of the lampshade. You can skip this part if your lampshade doesn’t need it.

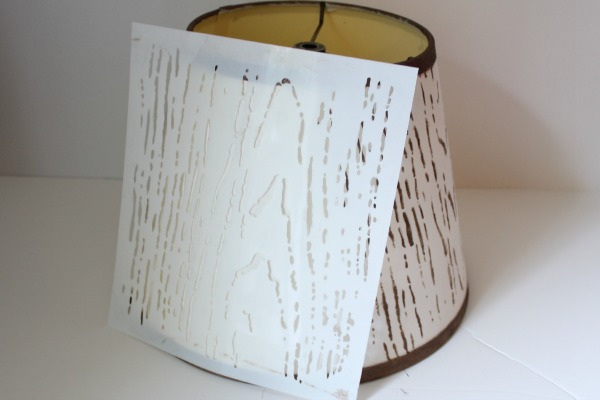
Step 2: While the trim is drying, apply the stencil adhesive to the back of the stencil. This was the first time I used stencil adhesive and it really helped to get that crisp edge, and it was simple to use. The adhesive has its own applicator on the bottle, you just press it on – all over the back of the stencil. Wait 10 minutes for the adhesive to become tacky, then it’s ready to use. It is repositionable, and cleans up with soap and water when you are done.
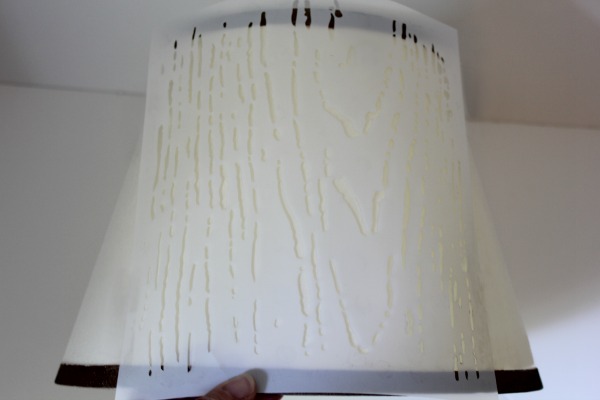
Step 3: Place the stencil on the center front of the lampshade. Press down to adhere in place. Add paint in a stippling (pouncing) motion. Tip: When stenciling the lampshade, turn it so that the area you are painting is closest to you (at the top of the circle). This will help with getting a nice clean stencil edge too.
When you are done painting the front of the lampshade, remove the stencil, wipe the front of the stencil clean while still wet and let the paint on the lampshade dry. This will help to keep wet paint from smudging when overlapping stencil areas.
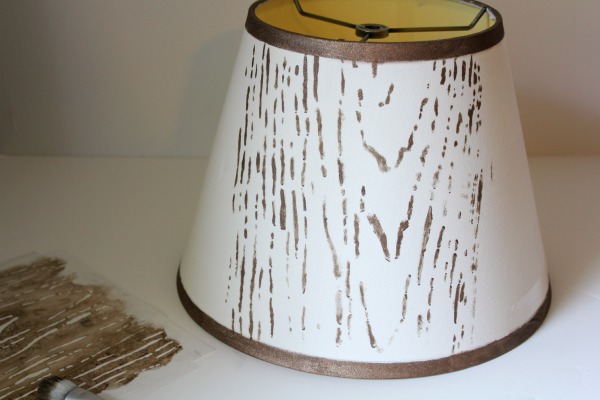
Step 4: Turn the stencil pattern upside down and repostion it next to previous painted area. Since my shade was a conical shape, I had a little overlap at the top. I didn’t stencil the overlapping areas.
Repeat Step 4 working your way around the lampshade turning the stencil and letting each section dry. Add more stencil adhesive if needed. Leave the back for last. This is a good place to make pattern adjustments. I was able to use the stencil four times evenly on my lampshade.
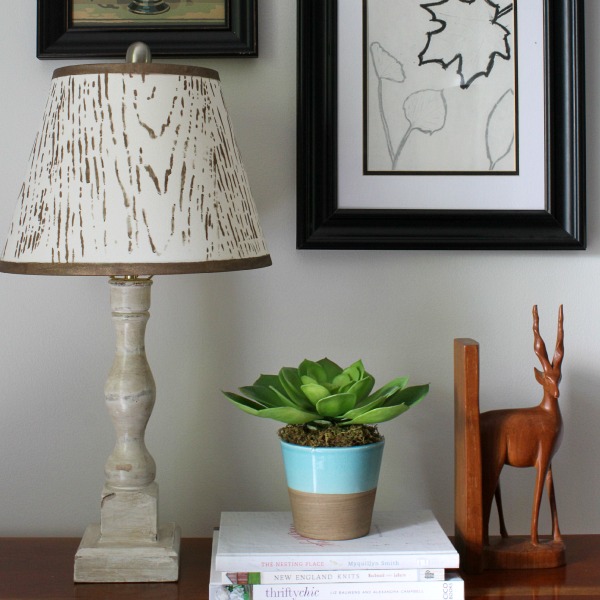
I love how the faux wood stenciled lampshade came out. It reminds me of birch bark. Wouldn’t this stencil be pretty in gold or silver for the holidays? Napkins, table runners, vases …, oh my!
Disclosure: Thank you to Plaid and FolkArt Paint & Stencils for sponsoring todays post. As always, all opinions, ideas and photos are my own.
For more creative projects using FolkArt Paint & Stencils, check out the Plaid Palette Blog / Sign up for their newsletter / or find them on Pinterest / Facebook / Instagram / Twitter / YouTube / G+

Sharing with:
love this, mary! i am aways up for a good faux bois!
LOVE the idea of silver or gold for the holidays – they’ll be here before you know it!
How cool! Love that stencil and it looks so good with your vignette! Thanks for linking up with us at Best of the Nest.