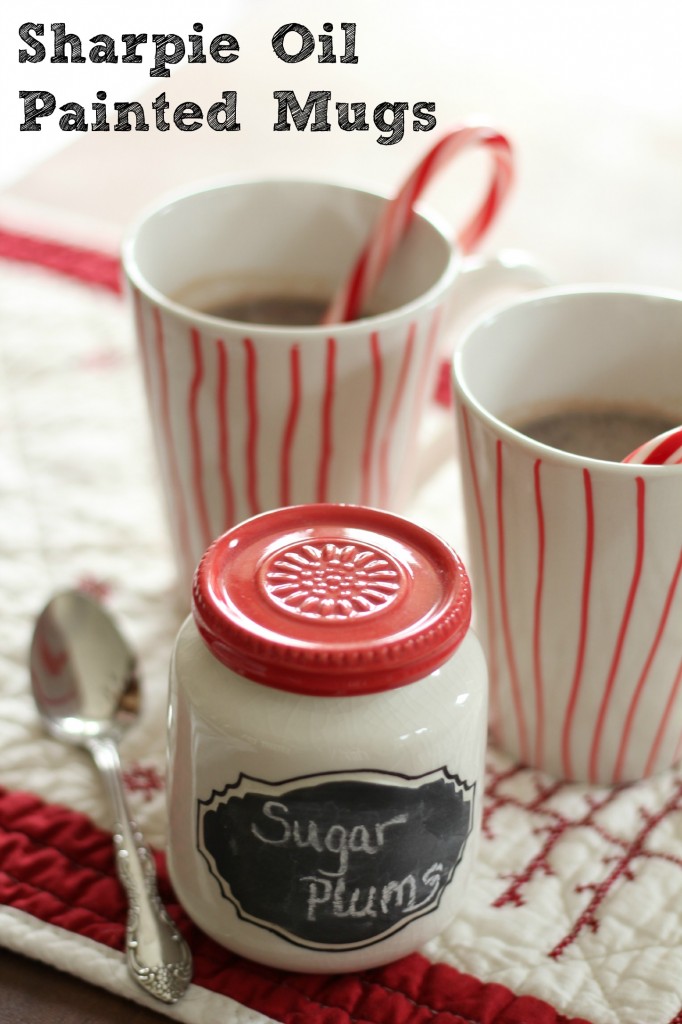

These mugs take about a minute to make if you don’t include the baking time to set the paint. They would make perfect gifts for teachers, mailmen, neighbors or that someone you want to do a little something for. I used dollar store mugs and a Sharpie Oil-Based Paint Pen. The key to the paint being permanent is the oil based marker along with baking it to set the paint. I know this because I experimented. Yep. I tried skipping the baking step and letting it air dry for 5 days, but when it went through the dishwasher most of the paint came off. But when I baked the mug and then washed it in the dishwasher the paint was permanent. I found a great tutorial on this at Scribbles from Emily.

Basically, I made random stripes on the mug. The kids could help with this. I liked how it looked like wood and I didn’t have to worry about perfection. When you are done painting the mugs, you place them upside down in a cold oven. Set the temperature for 350* Fahrenheit. When the oven comes to temperature, you start the timer for 30 minutes. When the timer goes off, shut off the oven and let the mugs slowly cool down inside the oven. Now the paint is set. Easy.
Now to make it more of a gift I added a package of hot cocoa along with some marshmallows and a chocolate dipped peppermint stick. The chocolate dipped peppermint sticks are super easy to make.

All you need is peppermint sticks, chocolate chips and sprinkles. I melted the chocolate chips in the microwave according to the package directions. Dipped the peppermint stick in the melted chocolate and set it down on wax paper. While it is still wet add sprinkles until your heart’s content. Let the chocolate set.

Now you are ready for some cellophane packaging and ribbon.

Add a tag and you have a sweet little gift for only a few dollars.

Sharing with:
Mary, the mugs are so whimsical and festive and just perfect for a gift! I’ve been scratching my head to come up with a small gift for our coworker’s potluck and you’ve provided the answer! Hopefully they carry the oil paint pen at JoAnn Fabrics. Thanks for a great idea!
Thanks for this post – our womens group at church is having a little coffee party and I have 20 dollar store mugs to decorate. You have helped me to make this much easier – thank-you!
Very Cool!!!
These mugs are really neat. What a great idea!
Hi Mary,
Wonderful and whimsical and white and red! Can it get any better?! Kudos to you for your fun and festive creations!
Have a happy weekend!
Poppy
Really cute idea!
What a cute idea, and so festive! They look like peppermint candies. I didn’t know Sharpie made oil pens, either, so thank you so much for sharing. Love it! ~Angela~
Mary….what a fun idea! I love the chocolate dipped candy canes! Thanks so much for sharing this fun idea!
blessings,
karianne
This is great. I was actually at the dollar-store this morning buying mugs to do this exact thing. I love your red stripes. They look so cute. Merry Christmas!
You have some great Christmas projects! Thanks for sharing them at the party. I am featuring your mugs on my fb page tonight.
🙂 Samantha @ Crafty Texas Girls
https://www.facebook.com/pages/Crafty-Texas-Girls/140299076008437
Very cute gift idea! 🙂
These are fantastically fancy. @susie- they are SO cute. We put our own spin on them by doing more than adding random lines. Hope this is ok. We were also slightly confused about the cold oven part but will be attempting that step shortly… Stay tuned!
I just did this, used oil-based sharpies, let it dry for 24 hours (other people said this keeps it from flaking off), then baked in oven as you described, used it, washed in dishwasher last night and used it again this morning. It looks fabulous and I am so excited to do more!
Can I use normal oil based paints and not sharpie ones?