
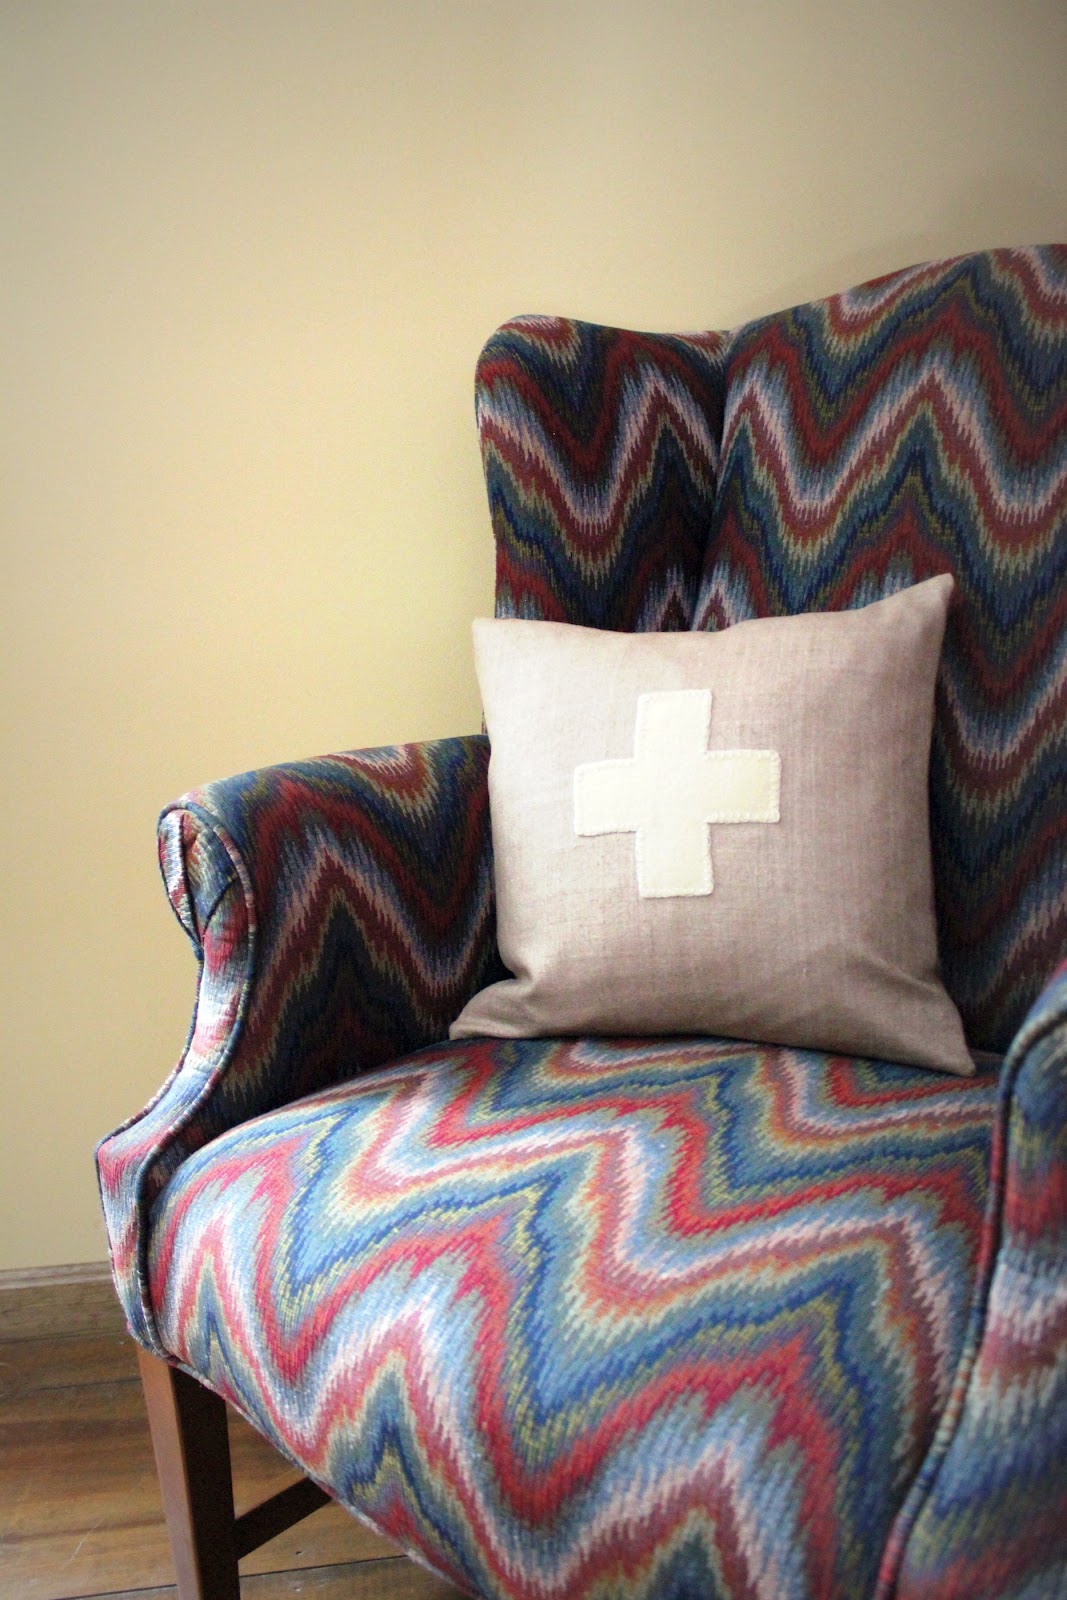
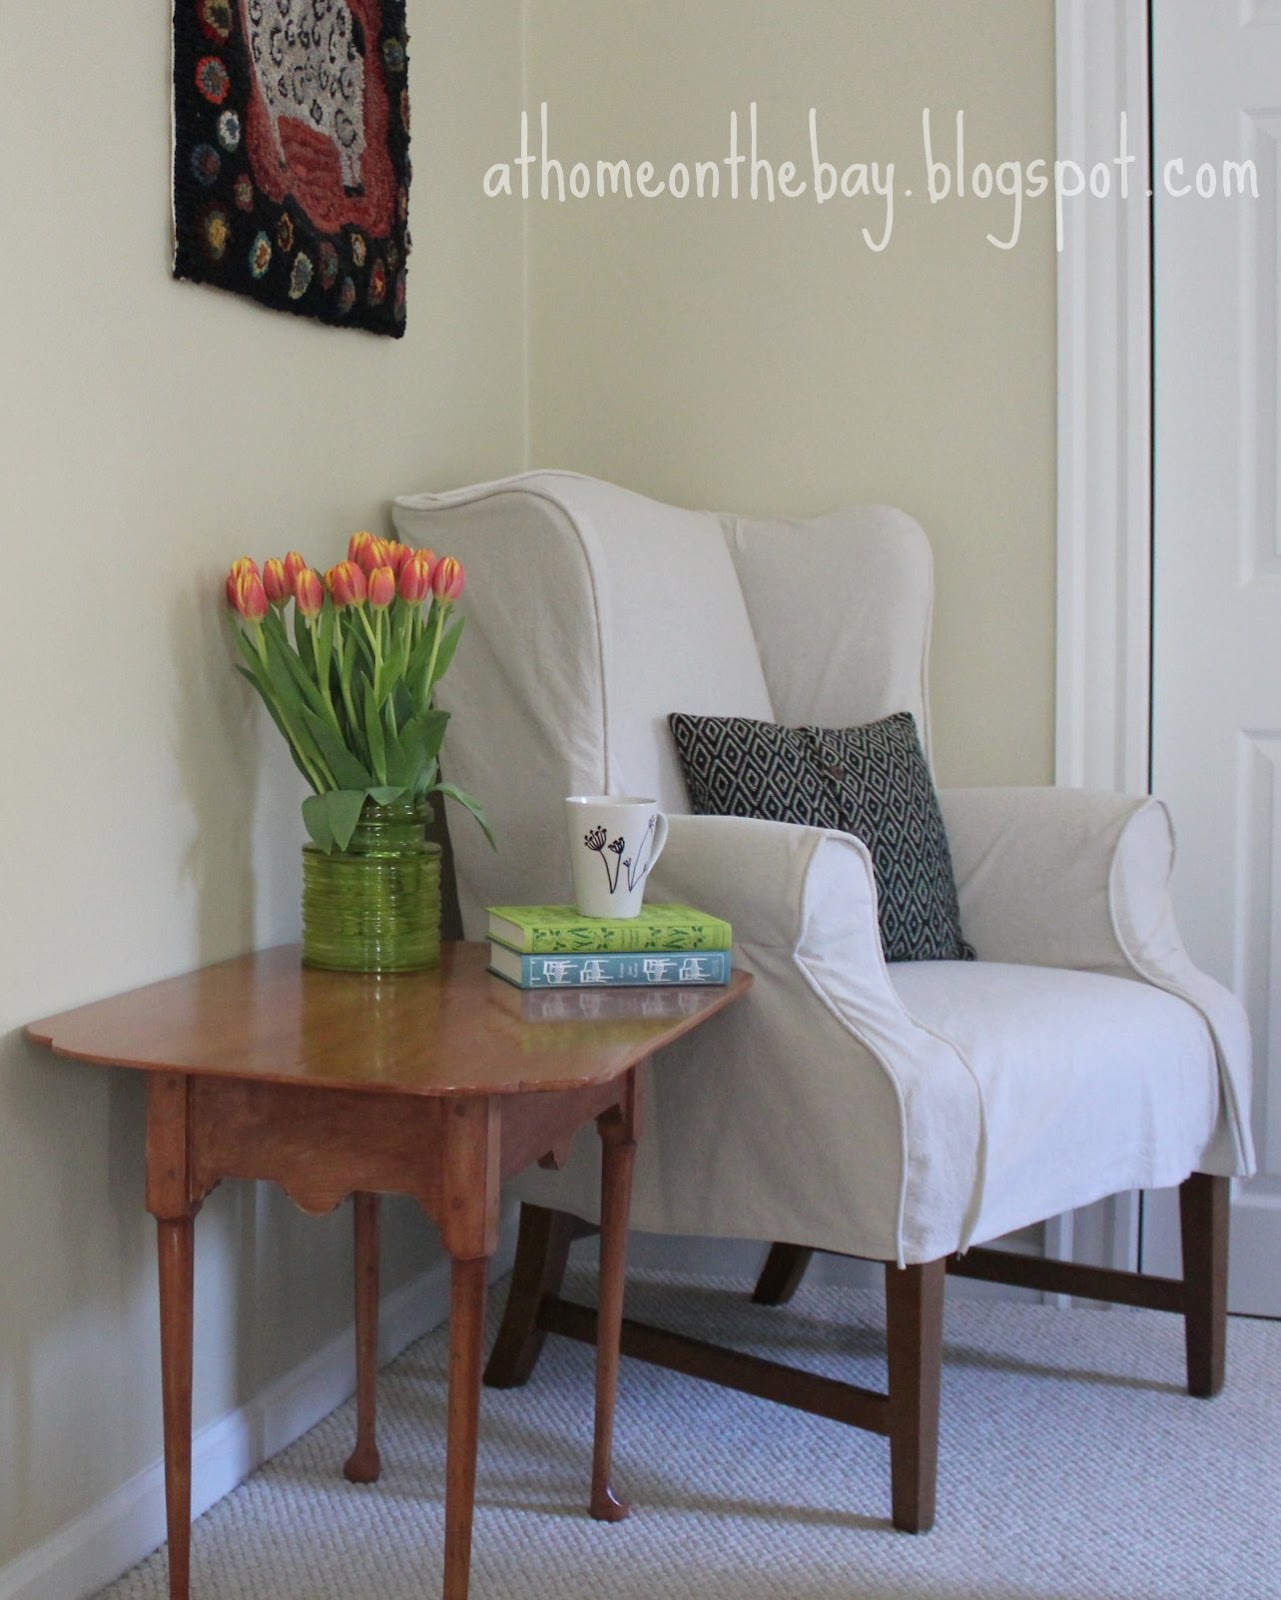
I have always loved this wing back chair with its classic styling and flame stitch upholstery. It looked beautiful in our last house, but our new house has a lighter feel to it. A slipcover seemed like the perfect solution. I do have some sewing skills, but I have never attempted anything like a slipcover. It seemed so out of my league, until I came across Miss Mustard Seed’s video tutorials. I’m a visual learner and they were just what I needed.
The tutorials are in six parts and each one has a lot of great tips. Marian offers lots of encouragement too. If you are thinking about trying a slipcover, I highly recommend these step-by-step videos. One of Marian’s tips is to make your first slipcover out of a drop cloth. They are inexpensive and durable and that is exactly what I did. The total cost for this project was under $20.

Marian suggests putting a new needle in your machine and having extra needles on hand and I’m so glad I listened. I used a Schmetz denim/jeans needle. They are sharp and easily penetrate the thickness of the fabrics. I needed to change my needle toward the end of the project. That is how quickly they can dull.

I cut 2 1/2 inch strips for the cording from the center length of the drop cloth. The curves around the arm with their bias cuts were tricky, but I used lots of pins and that helped quite a bit.

For the back, Marian suggests ties, which look beautiful, but I opted for a covered button closure.

Covered buttons are easy to make, and like the ties, I think they add that custom look.

I used Dritz Half Ball Cover Buttons – size 45. They make a nice sized button – 1 1/8″. The back of the package has a circle template which you can use for cutting. Place the template on top of the button fabric. Cut fabric out. Place button cover in center of fabric circle and working from side to side and top to bottom, stretch and hook fabric onto teeth. Work around button until the fabric is smooth and tight. When you are happy with how the front of the button looks, snap the backplate on to the button cover. These are great for pillows and clothing too.
To make the fabric loop closure, I cut a 1″ x 7″ piece of matching fabric. Pressed each side in a 1/4 ” toward the center. Folded the outer edges together, matching the folded edges and pinning together. Sew along the outer edge. You end up with a finished strip that is 1/4″ x 7″ for the loop.

I attached the loop and buttons to the center back of chair.

If I had an antique French grain sack, I would have done a bunch of buttons and loops down the back.
Cost Breakdown:
6′ x 9′ Canvas Drop Cloth – 8oz. $11.00
Wrights 6/32″ Cotton Filler Cord – 10 yds $ 4.00
Dritz Half Ball Button Covers – size 45 $ 3.00
Total Cost $18.00
Thanks Marian!

love it. I have 2 wing back chairs that I would to make slip covers for but am a hesitant because I think it might be too difficult for me. I have never used the cording before.
Marian gives tips on the cording too!
I am busy slip covering other items before I tackle my wing back chairs and sofa. You did a great job and I am inspired to get those chairs covered.
Thank you!
Thank you so much for posting this! I love wingback chairs and always see them at yard sales but they don’t match my decor and I didn’t want to invest the money to have them re-upholstered. Next time I come across one, I’m getting it! Blessings….Tammy
Thank you Tammy!
I was surprised that you used a 6 x9 drop cloth. I had been thinking I had better get a big one. Did you make your first cuts on the long side or the short side? I have a wing chair in my living room that I am going to attempt to cover but have been procrastinating for years. I saw Marian’s videos ages ago but still have not worked up the courage! I think that first cut is the one that makes me the most nervous though using a drop cloth it won’t be that expensive if I do make a mistake.
Suzan I was scared to make my first cut too. I used a 6 x 9 drop cloth, because I didn’t have a seat cushion to cover. I had just enough fabric, with only scraps left. My first cut I made was down the middle of the drop cloth to make the cording strips. after I cut the three strips I needed to make the cording, I had two large half pieces with lots of finished edges to work with for the slipcover. I hope that makes sense and I’d be happy to answer more questions for you.
Love it! I took a reupholstering class once and they said that wing chairs were some of the harder pieces to re-cover – you did a GREAT job! I’m so impressed and inspired. And you’re in Maine?! I love Maine. We want to retire there too – we try to go up every summer for rest, relaxation and lobsters :-). I’m a new subscriber, and hope you can check out my blog too – http://www.onedogwoof.blogspot.com
Wow! I’ve had two wingbacks since last summer that I need to do something with (they’re pink and not in a good way), but I’m scared to start! Will you do mine? 🙂
Mary, I was so excited to see another slipcover made. Ive watched Marian’s
video Im such a chicken to get started on mine, just bought a wing back
chair off craigslist for $50.00 you have inspired me, Ill get started
on it after my trip to Maine visiting my daughter in Portland wish I could live in Maine.
Elisa
THis really encourges me to try it I also have an old wing back chair I love but not the old materail on it
You did a great job and it looks great also
good for you
What a beautiful job.
Thank you everyone! So glad this inspired people to give it a try.
You did a beautiful job. and thanks for the link to the tutorials.
Kathy
I’m so jealous you can sew like that, it’s so professional looking! This project would be perfect for our new linky party featuring “Transformations” called Repurpose-Remodel-Reveal, I know our readers would love to see it too! (It starts Friday, March 2nd 2012 at 7:00 am MST and reoccures every 1st and 3rd Friday)
I love it! It looks great. I found you at The Rooster and The Hen party 🙂
Debbie
This is exactly what I need! I have an old mauve reclining wingback that has a torn seat. I’ve been trying to figure out a great way to recover it, and even my expert-seamstress-mom was stumped! We’re going to do this for sure! Love your loop and buttons idea too. 🙂
Thanks!
Jen